Swatches
Swatches serve as miniature visual representations of colors, patterns, textures, and other product attributes, providing customers with an intuitive way to understand product variations directly on your storefront.
This guide walks you through creating and managing Swatches, Swatch Collections, and Swatch Types within the PIM system.
To learn more about Swatches, go to Key Concepts.
Create a Swatch
Step 1: Accessing Swatches
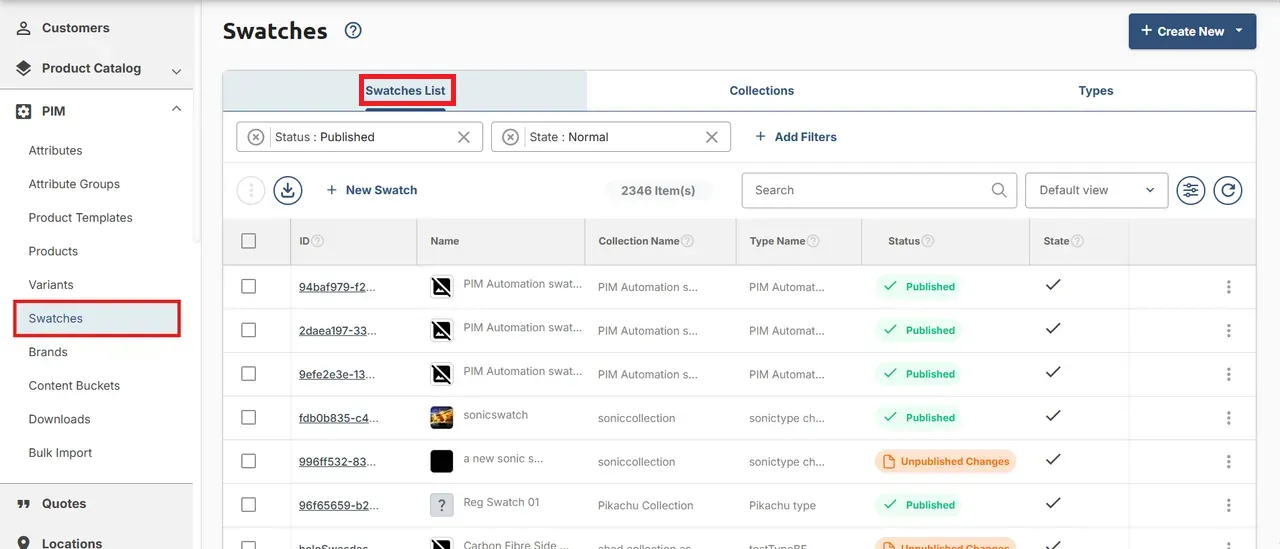
Upon logging in, navigate to the side menu of the NoChannel Commerce Portal, go to PIM, and click on Swatches.
Step 2: Initiate Swatch Creation
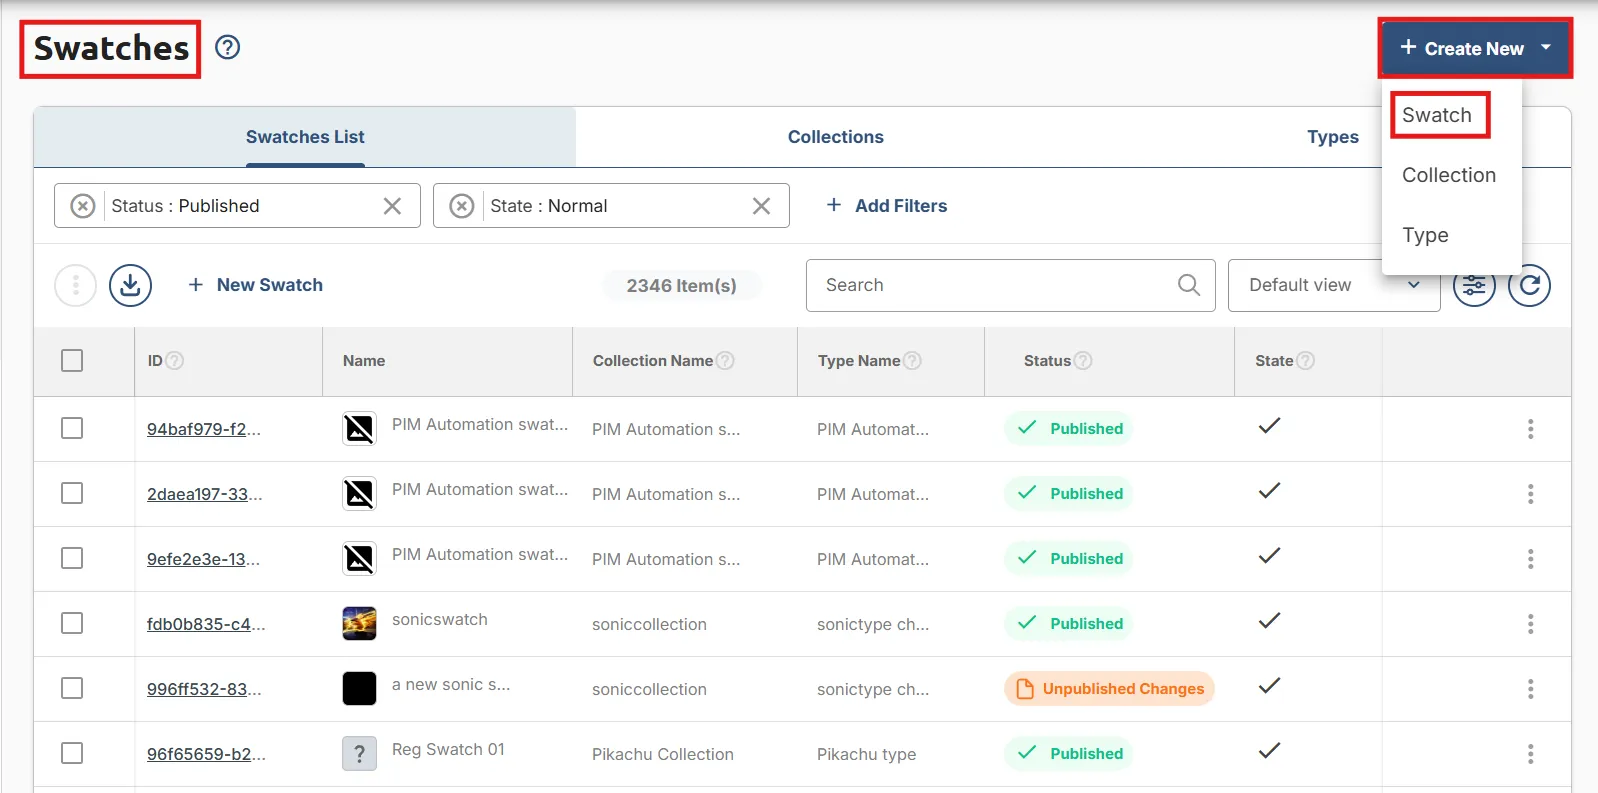
- Once in the Swatches section, click on the Add New button at the top-right corner of the screen.
- Clicking this button will open a dropdown with three options: Swatch, Collection, and Type. Choose Swatch to begin creating a new swatch.
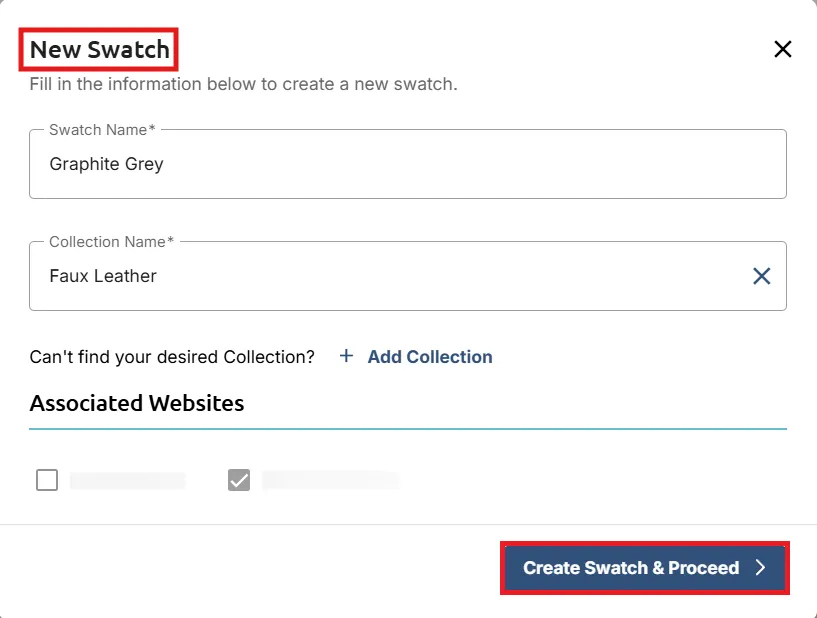
You will be directed to the New Swatch page.
- Swatch Name: Enter a descriptive name (e.g., “Ocean Blue”).
- Collection Name: Select an existing collection or click Create New Collection to add a new one.
- Associated Website: Select the relevant site from your list.
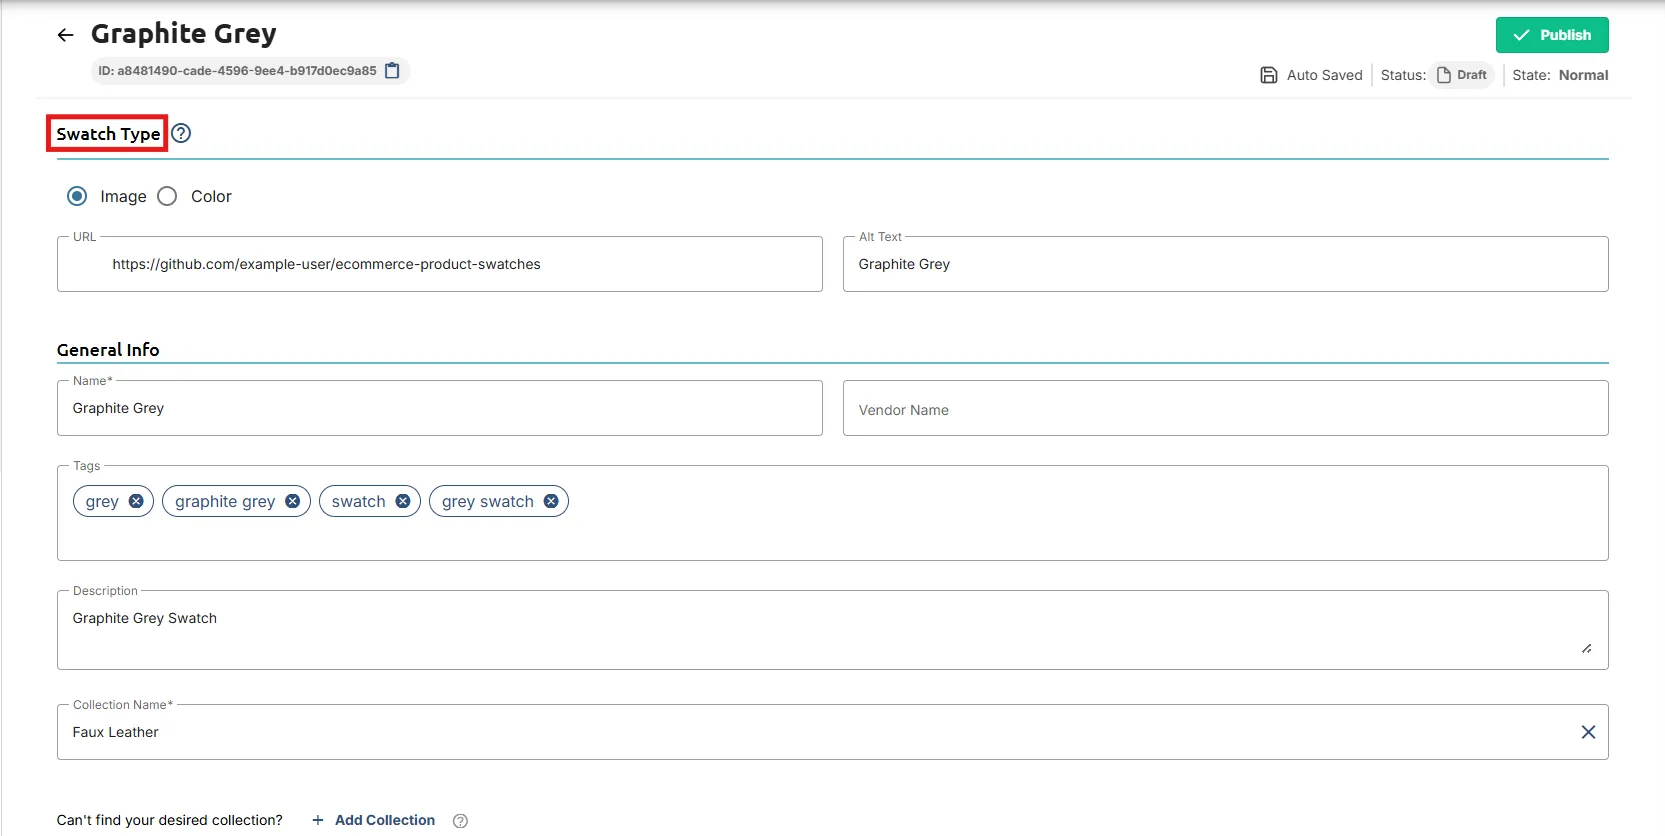
- In the Swatch Type section, choose between the options provided: image or color.
- For Image: Upload the relevant image that represents the swatch.
- For Color: Select the appropriate color from the provided collection.
- In the General Info section, provide the following details:
- Name: Enter a descriptive name for the swatch.
- Collection Name: Specify the collection to which the swatch belongs. If you wish to create a new swatch collection, click on the Create New Collection button.
- Vendor: Indicate the vendor associated with the swatch.
- Description: Provide a brief description of the swatch.
- Tags: Add relevant tags to categorize the swatch.
Step 4: Publish
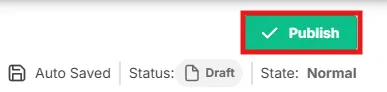
Once satisfied, click on the Publish button to finalize and publish the swatch on the PIM platform, making it accessible for use.
Create a Swatch Collection
Step 1: Accessing Swatch
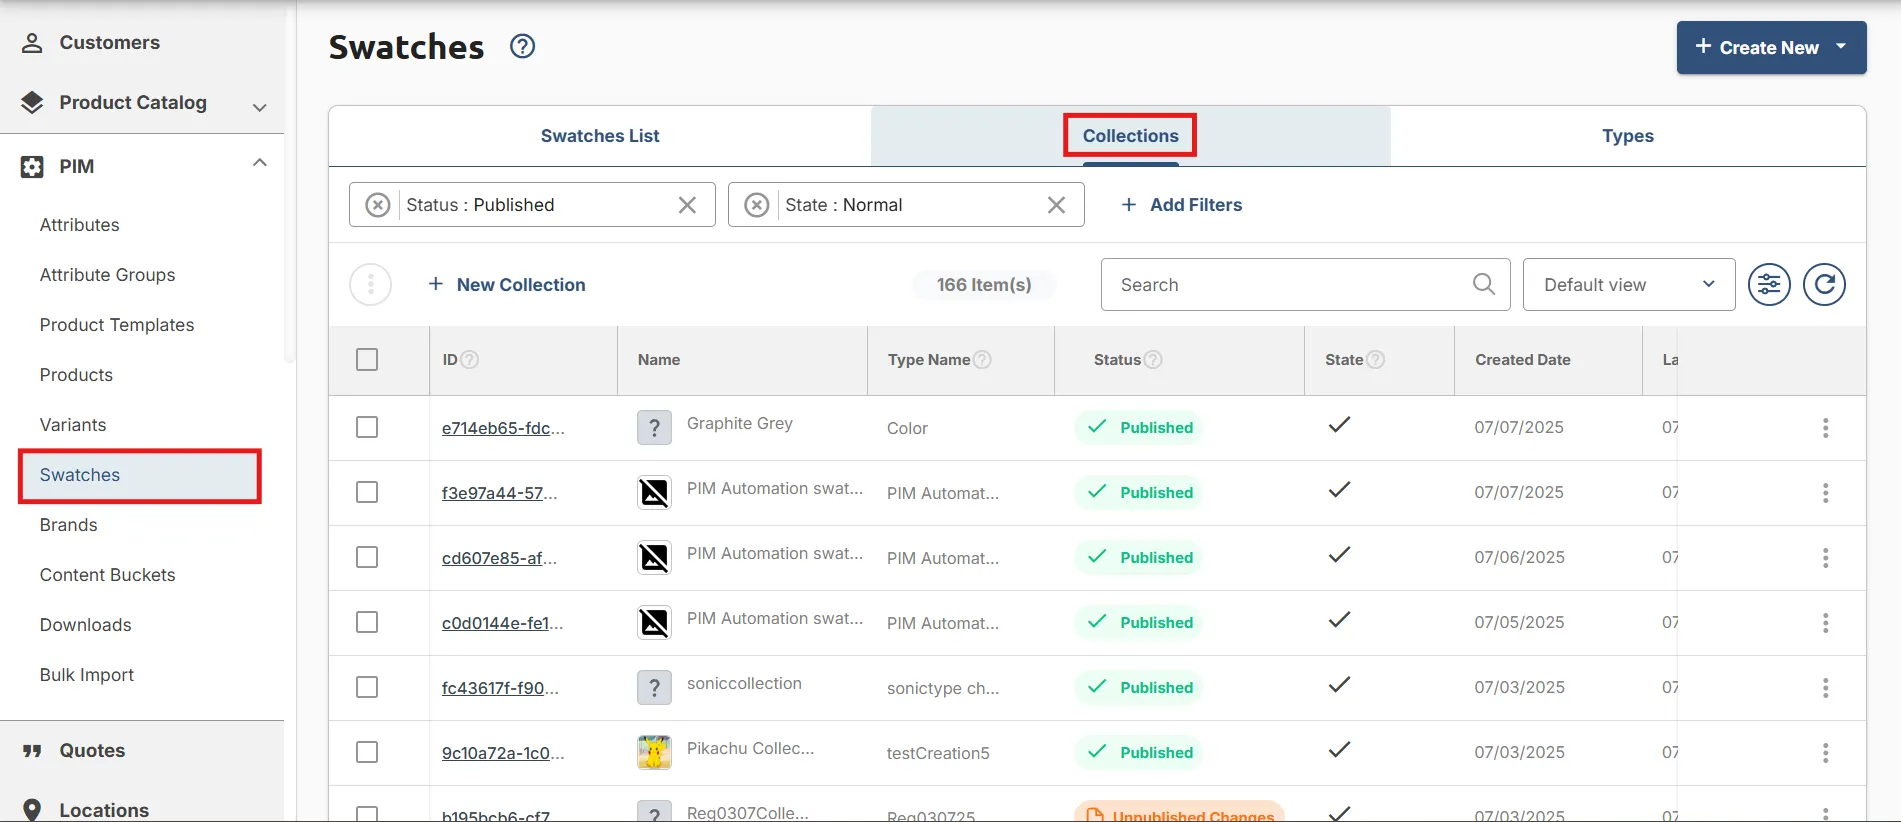
Upon logging in, navigate to the side menu of the NoChannel Commerce Portal, go to PIM, and click on Swatches and then click on Collections tab.
Step 2: Initiate Swatch Collection Creation
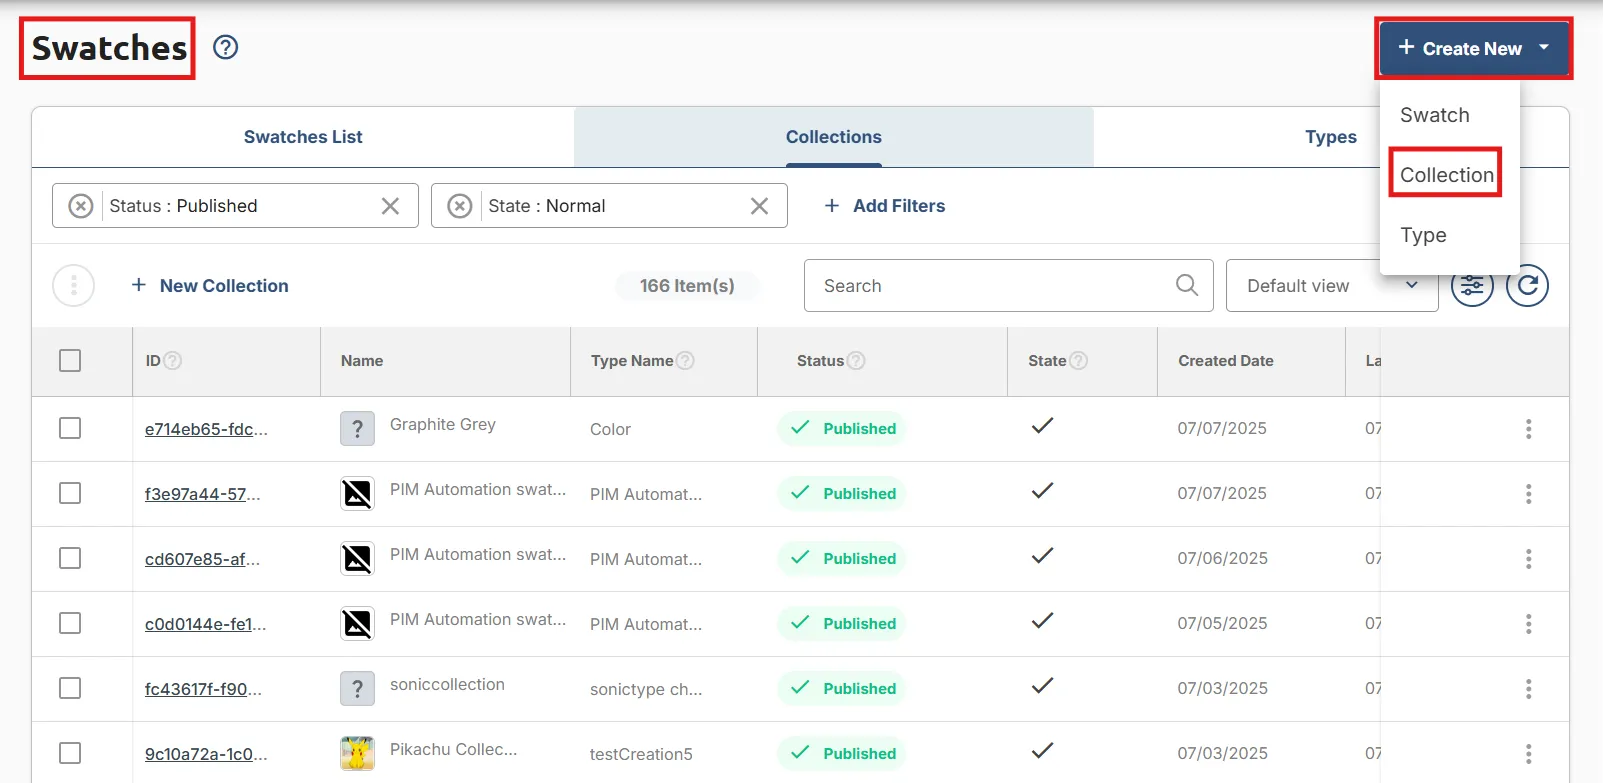
- Once in the Swatches section, click on the Add New button at the top-right corner of the screen.
- Clicking this button will open a dropdown with three options: Swatch, Collection, and Type. Choose Collections to begin creating a new Swatch Collection.
Step 3: Fill in General Information
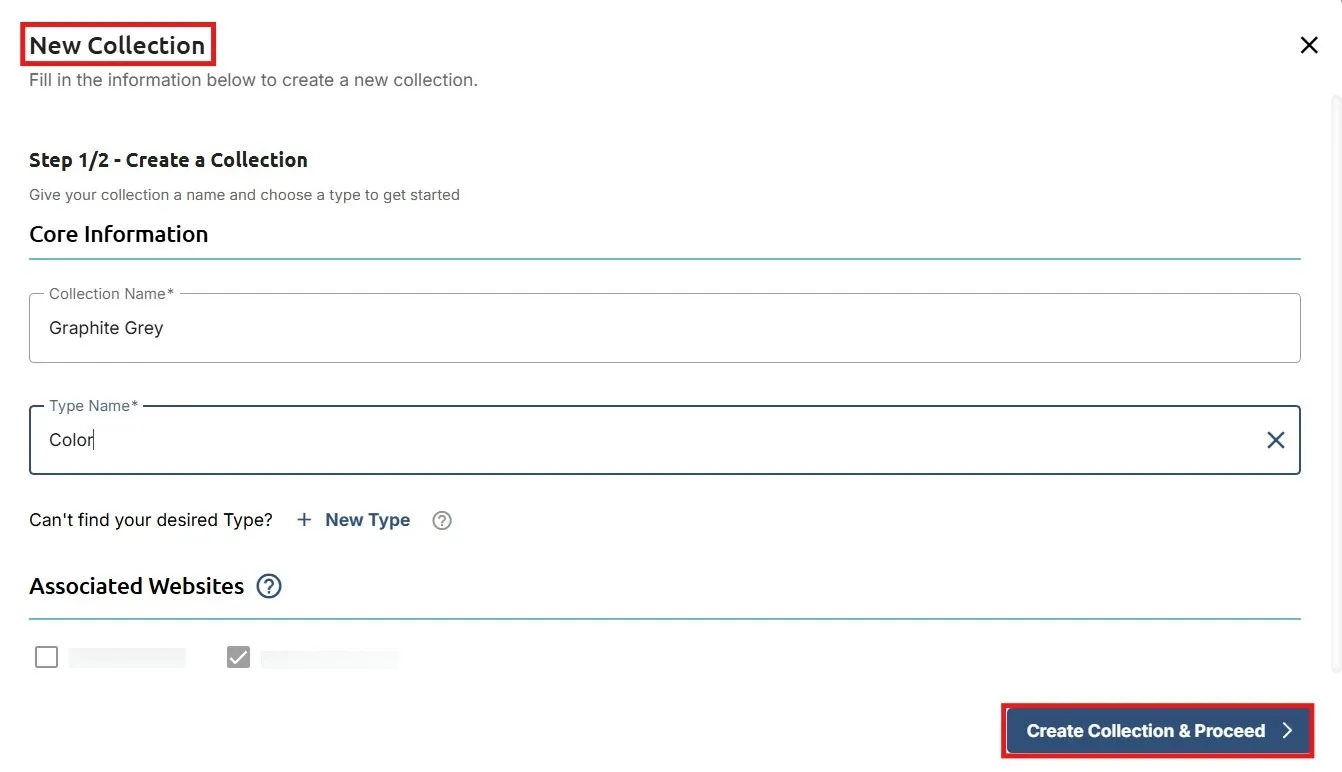
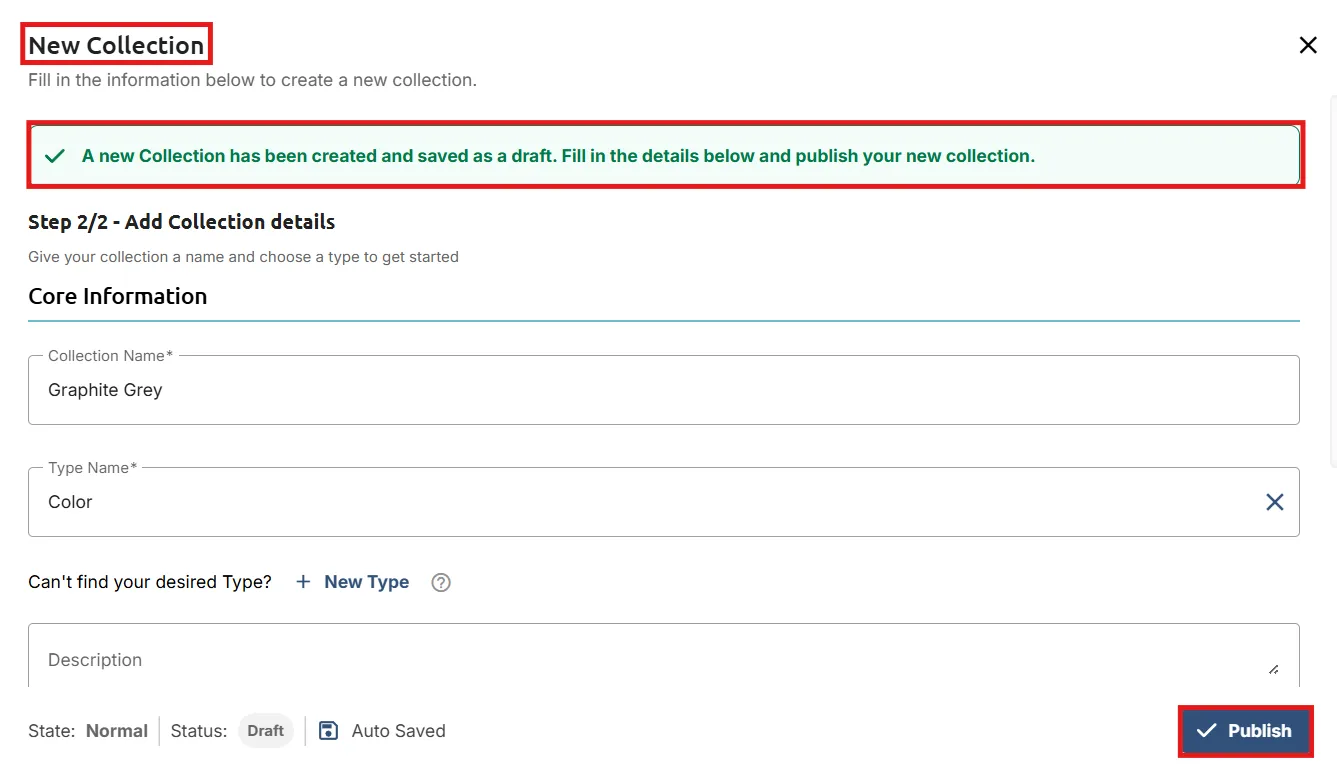
You will be directed to the New Collection page.
- Begin by associating your website with PIM by selecting one from the site lists.
- In the Core Information section, provide the following details:
- Name: Enter a descriptive name for the swatch collection.
- Type Name: Specify the type to which the swatch belongs. If you wish to create a new swatch type, click the Create Type button.
Step 4: Publish
Click on the Publish button to finalize and publish the swatch collection on the PIM platform, making it accessible for use.
Create a Type
Step 1: Accessing Swatch
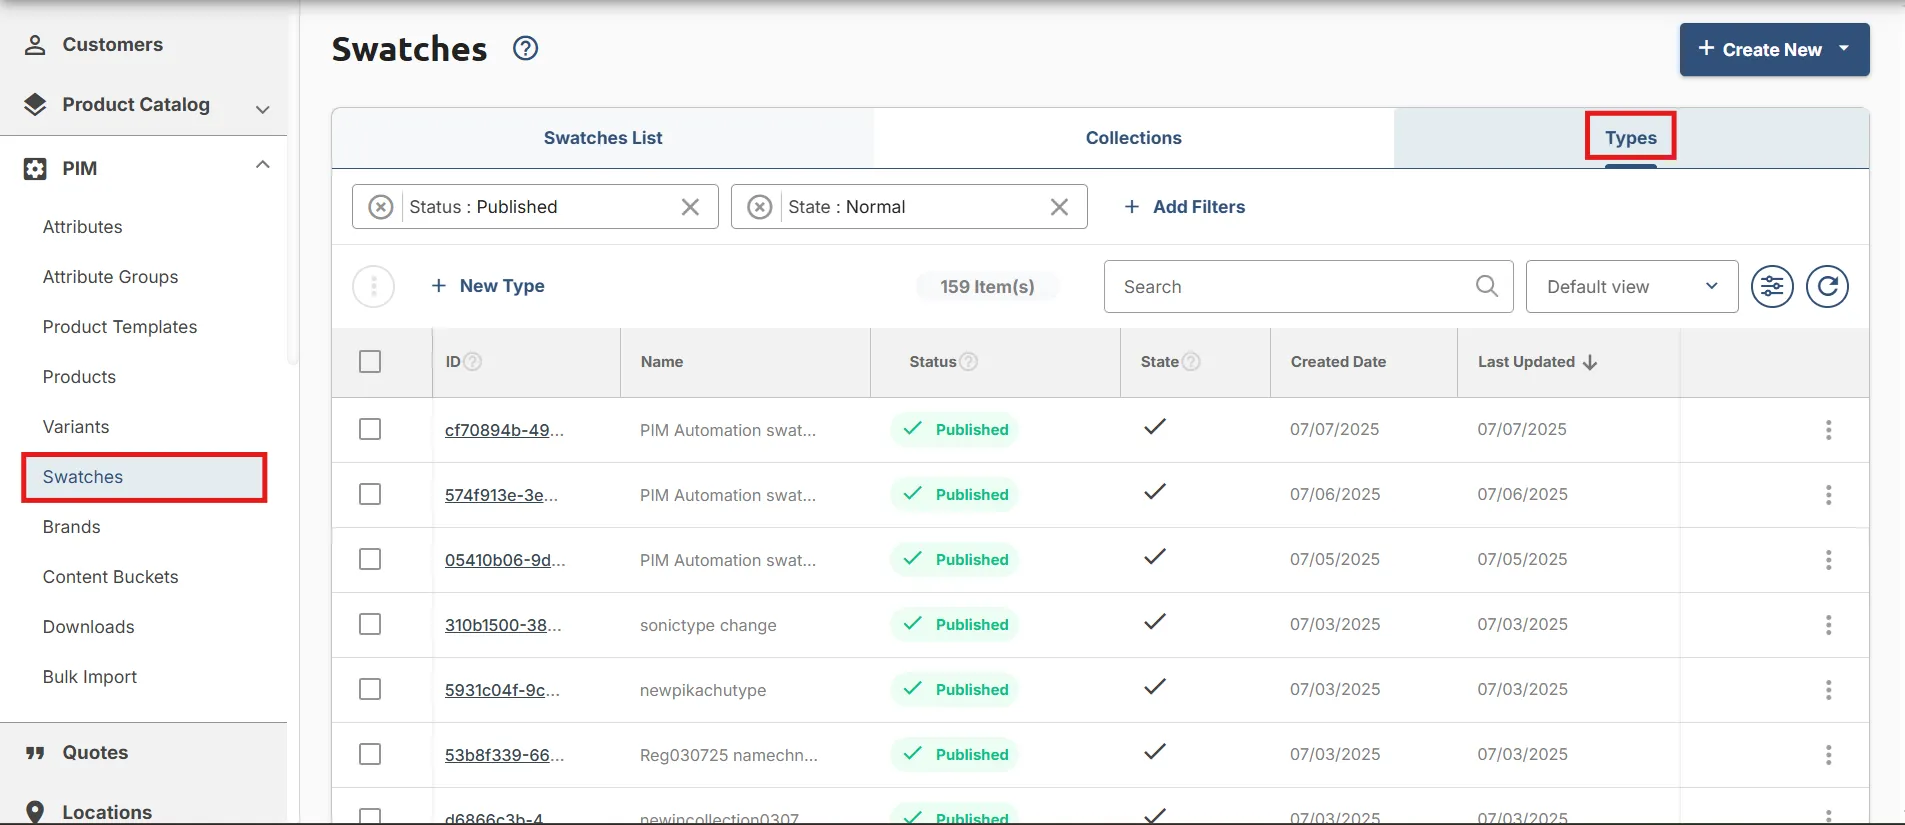
Upon logging in, navigate to the side menu of the NoChannel Commerce Portal, go to PIM, and click on Swatches and then click on Types tab.
Step 2: Initiate Type Creation
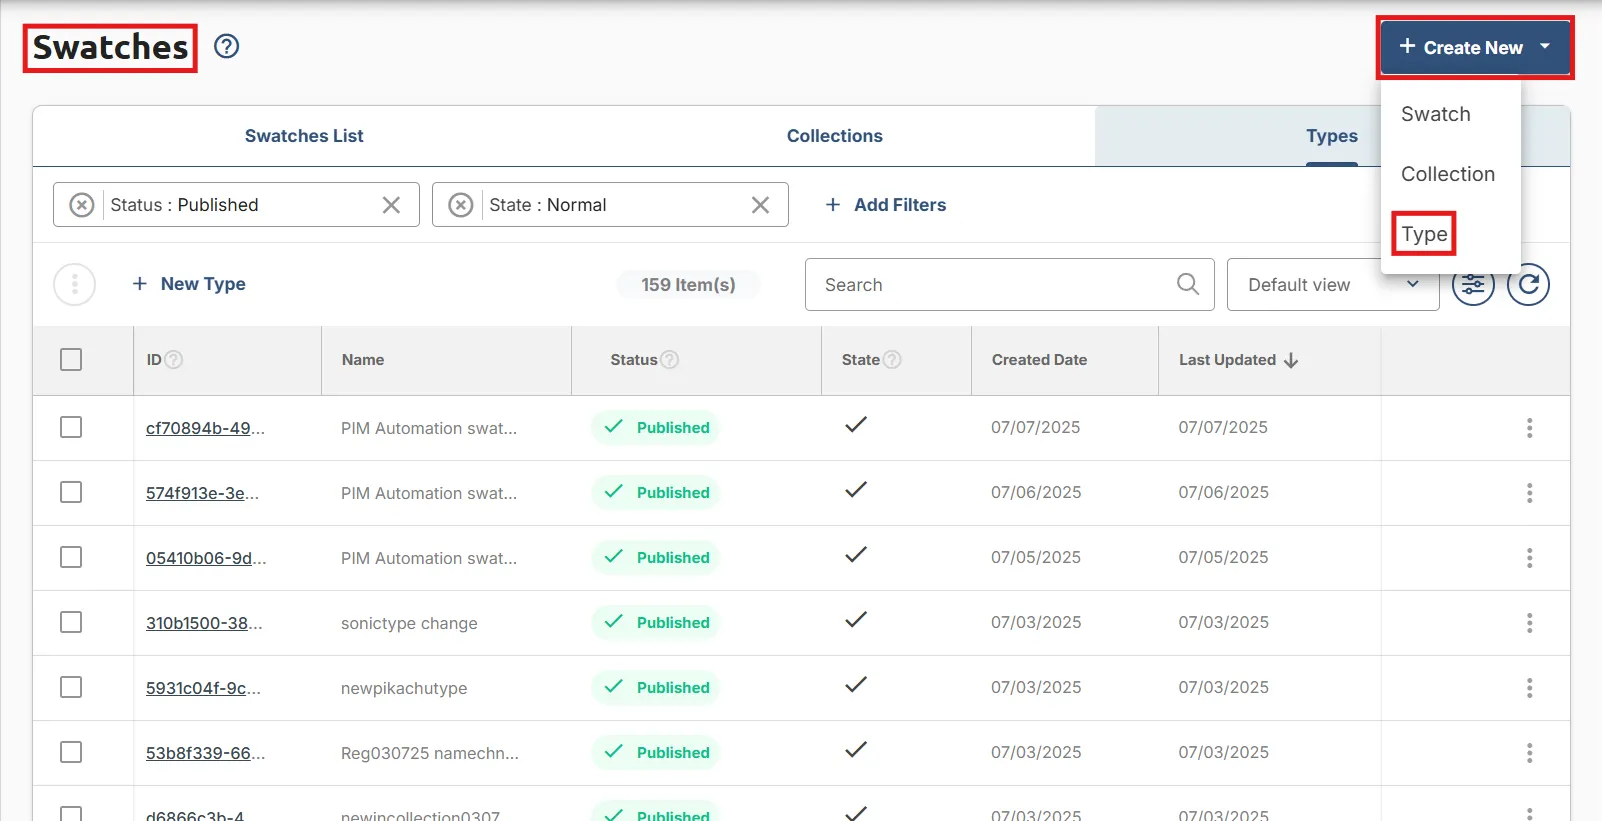
- Once in the Swatches section, click on the Add New button at the top-right corner of the screen.
- Clicking this button will open a dropdown with three options: Swatch, Collection, and Type. Choose Types to begin creating a new Swatch Collection.
Step 3: Fill in General Information
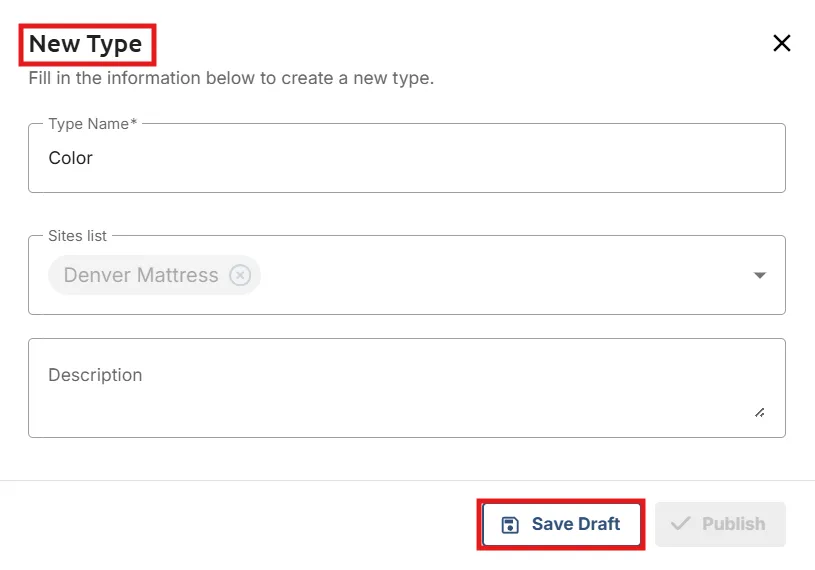
You will be directed to the Create Swatch page.
- Begin by associating your website with PIM by selecting one from the site lists.
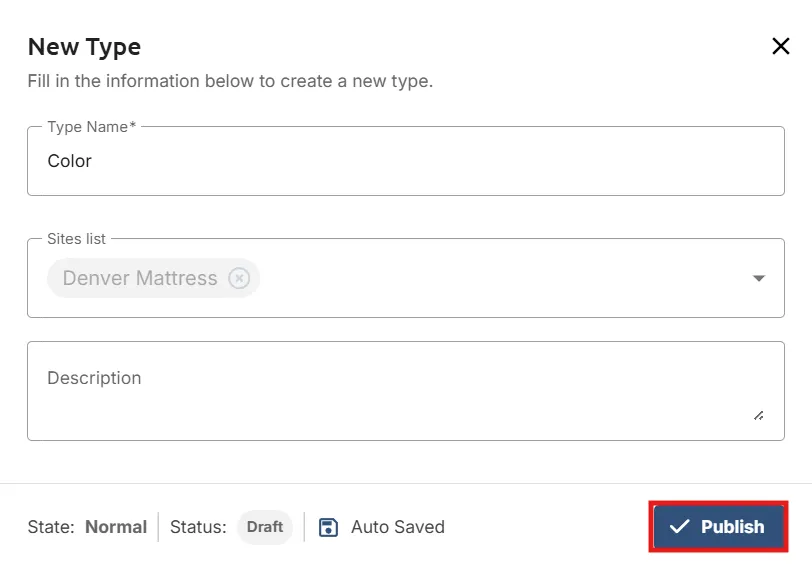
- In the General Info section, provide the following details:
- Name: Enter a descriptive name for the swatch type.
Step 4: Publish
- After inputting all the necessary details, click the Save Draft button to save your swatch type.
- Once satisfied, click on the Publish button to finalize and publish the swatch type on the PIM platform, making it accessible for use.
Note: When modifying a published swatch, collection, or type, the system creates a draft with the status "Edits in Published." Your live version remains unchanged until the updated draft is published. Saving as a draft lets you refine swatch details or experiment with new options without affecting the current display. Be sure to review and publish your changes to make them visible on the PIM platform.