Product Templates
Product Templates serve as the basis of structured data management, enabling organizations to streamline the process of creating and managing diverse product catalogs.
In this guide, we'll walk you through the step-by-step process of creating and managing product templates within the PIM system.
To learn more about Product Templates, go to Key Concepts.
Step 1: Accessing Product Templates
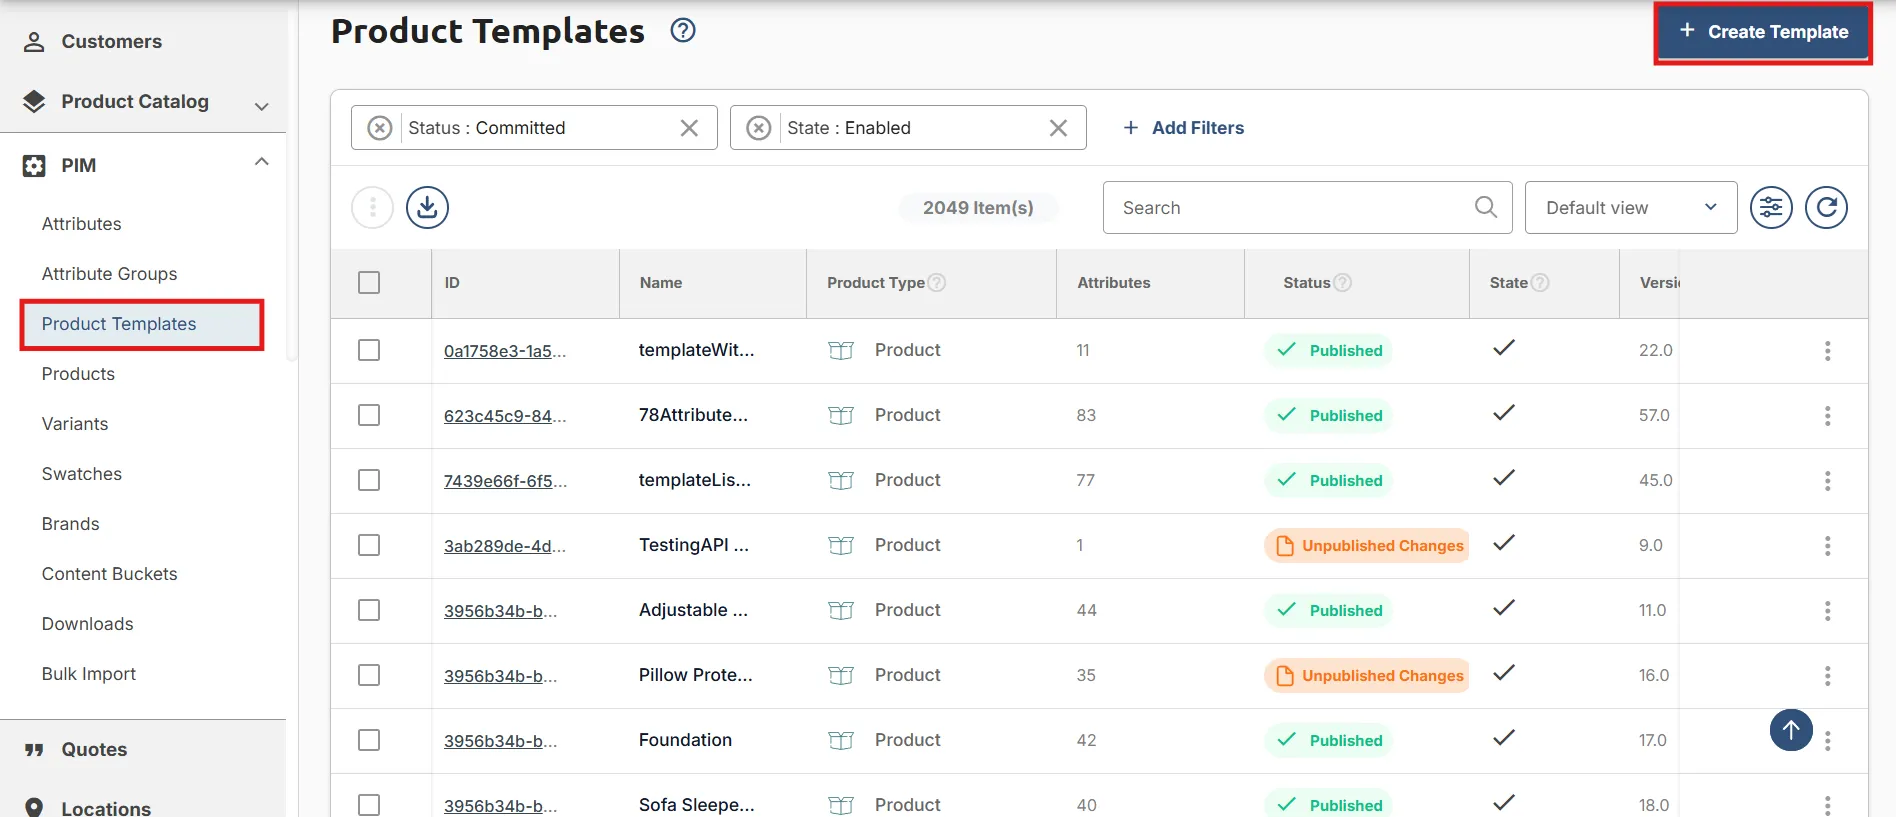
Upon logging in, navigate to the side menu of the NoChannel Commerce Portal, go to PIM, and click on Product Templates.
Click on the +Create Template at the top right to initiate the product template creation process.
Step 2: Defining Product Template Details
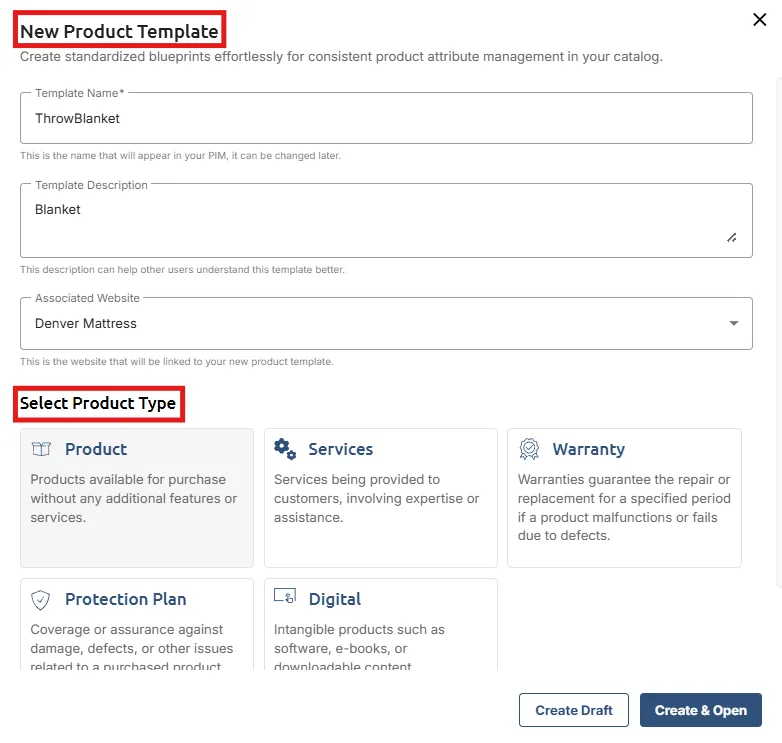
Once you've initiated the Product Template creation process, input the following essential details:
- Template Name: Enter a Template Name that identifies the Template you are creating.
- Template Description: Enter a brief description to help others understand the use of the Template. e.g., Template for Shirt.
- Product Type: Select the appropriate Product Type based on the nature of the template:
- Products: Choose this option if your template contains simple products without additional services or features. This allows you to capture attributes specific to physical items like size, weight, and color.
- Services: Choose this option if your template includes services such as expertise, assistance, and support. This allows you to define attributes related to service duration, features, and support options.
- Warranty: Choose this option when creating templates for products that come with a warranty, like electronic devices or appliances.
- Protection Plan: Choose this option for coverage or insurance against damage, defects, or other issues related to products.
- Digital: Select this option for intangible products such as software, eBooks, or downloadable content. This lets you define attributes such as version, license type, and download instructions.
For more details on the Product Types, go to Key Concepts.
Note: Products and Variants are managed as separate entities within the PIM system, but Product Templates serve as a structured framework to define shared attributes and configurations across both, ensuring consistency while maintaining operational separation.
Step 3: Finalizing Product Template Creation
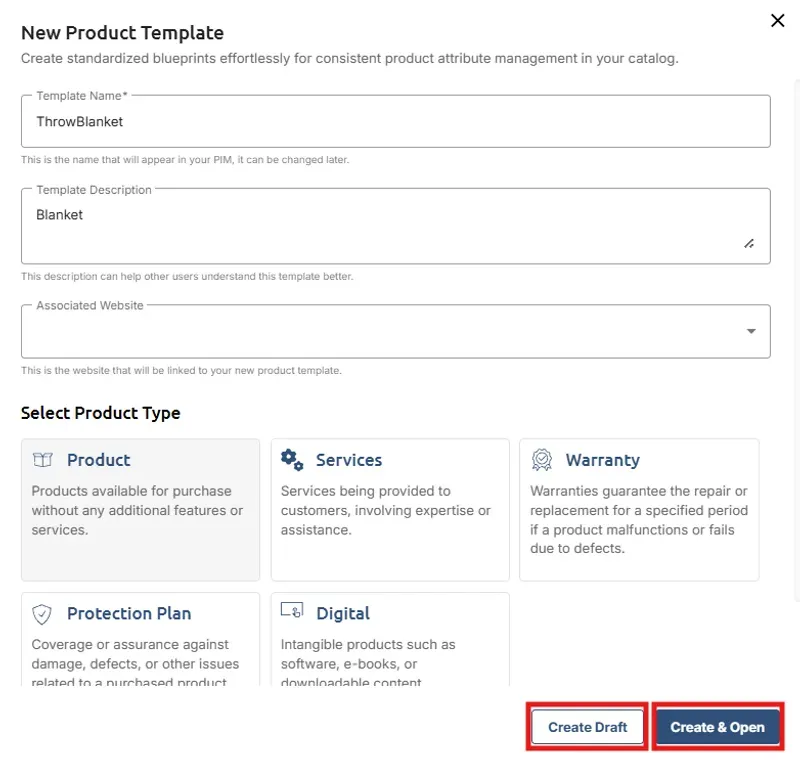
- Create Draft: You can save your template as a draft, keeping it unpublished on the portal. This grants you the flexibility to revisit and edit the template at your convenience before making it live.
- Create & Open: You will be directed to the Product Template Details. This is the preferred choice when you intend to make the Template live and immediately utilize it on the NoChannel Commerce Portal.
Step 4: Configuring Product Template Details
On the Product Template Details page, configure template details by adding the attributes to the group.
You can also edit the Template Information details like Template Name, Description, and Tags.
- Select the list of attributes or attribute groups from the dropdown that you want to add to this product template. After selecting, click on the ADD button to save the changes. You can also remove the added attributes by clicking on the "-" icon next to the attribute.
Note: Variants utilizing the same Product Template can be linked to multiple products, enabling reusable variant configurations across your catalog while maintaining consistent structures.
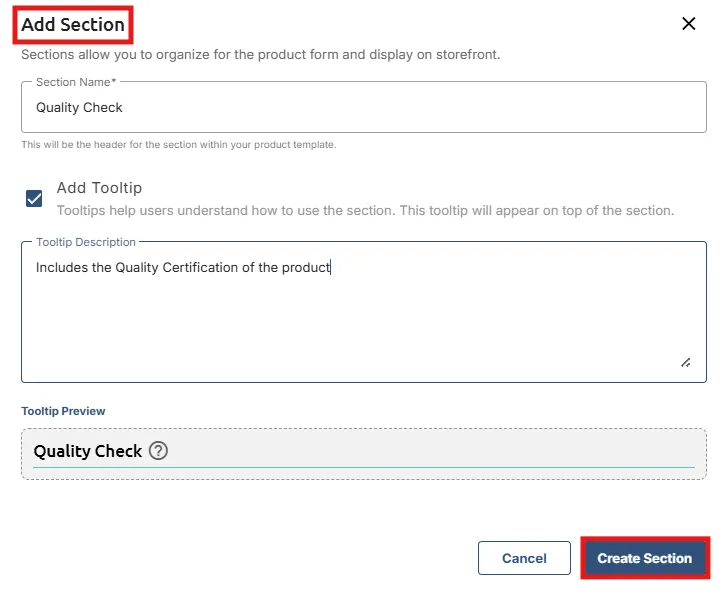
Sections allow you to organize attributes and attribute groups logically within the template, ensuring structured presentation on the storefront and easier management of product data.
To create a section:
- Enter a Section Name to identify the group of attributes.
- Optionally add a Description for internal reference, helping your team understand the purpose of this section.
- Use the available controls to manage the order of sections for consistent display across products.
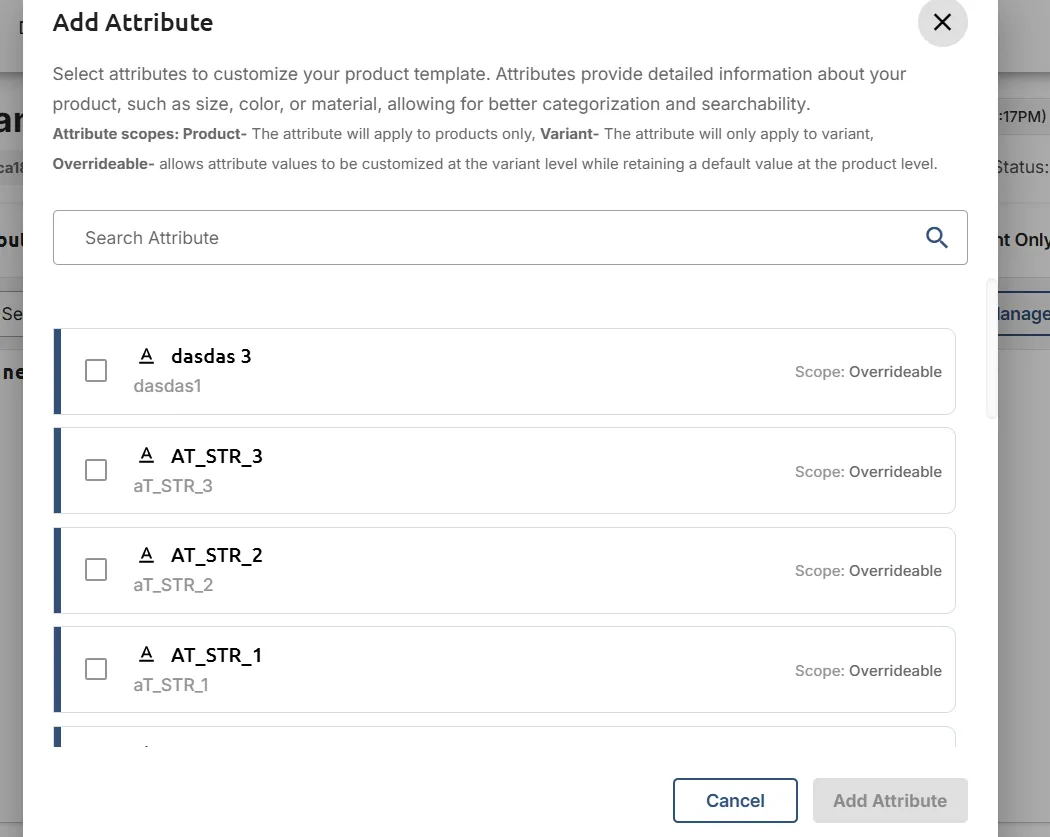
The “Add Attribute” modal when assigning attributes to a section within a Product Template allows you to select one or more attributes to include within a specific section of your product template, ensuring structured data presentation and management.
- Attribute Search: Use the Search Attribute bar to quickly find the attribute you need by name or code, streamlining the selection process within large catalogs.
- Attribute Scopes Displayed:
- Product: Attribute applies only at the product level.
- Variant: Attribute applies only at the variant level.
- Overrideable: Attribute defaults at the product level but can be customized at the variant level.
- Selection: Check the box next to the attributes you wish to add.
- Action Buttons:
- Cancel: Exit without adding attributes.
- Add Attribute: Confirm your selection to add the attributes to the chosen section within the template.
Using this modal ensures you efficiently manage attributes across product templates while maintaining data consistency and supporting advanced filtering on your storefront.
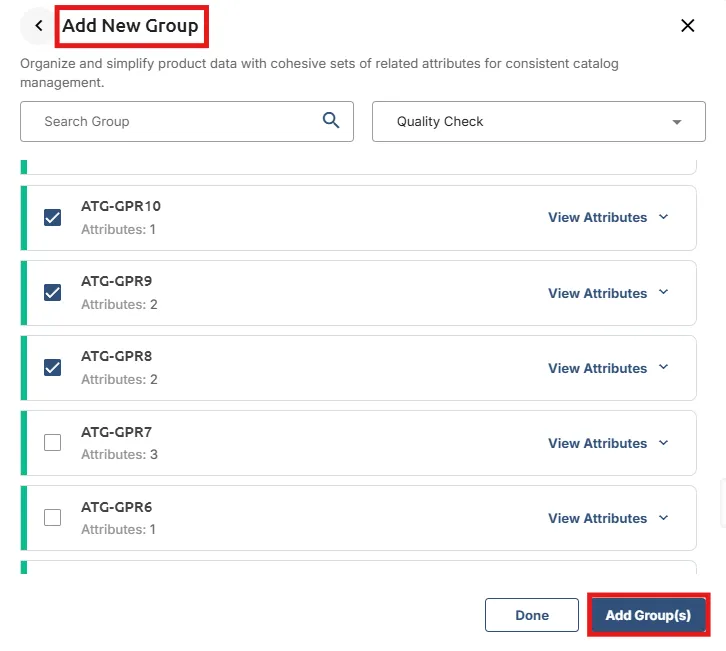
To assign Attribute Groups to a specific section within your Product Template:
- Use the dropdown menu to select one or more Attribute Groups relevant to the section.
- Click Add to Section to attach the selected Attribute Groups to the section you have created.
- Assigned groups will appear under the section for easy review and reordering if necessary.
This functionality enables you to maintain structured, logical groupings of attributes in your catalog while ensuring consistent presentation across all products using the template.
Note: Sections may have locked configurations that prevent changes to certain defaults, ensuring uniformity across products using the template.
Step 5: Publish Product Template
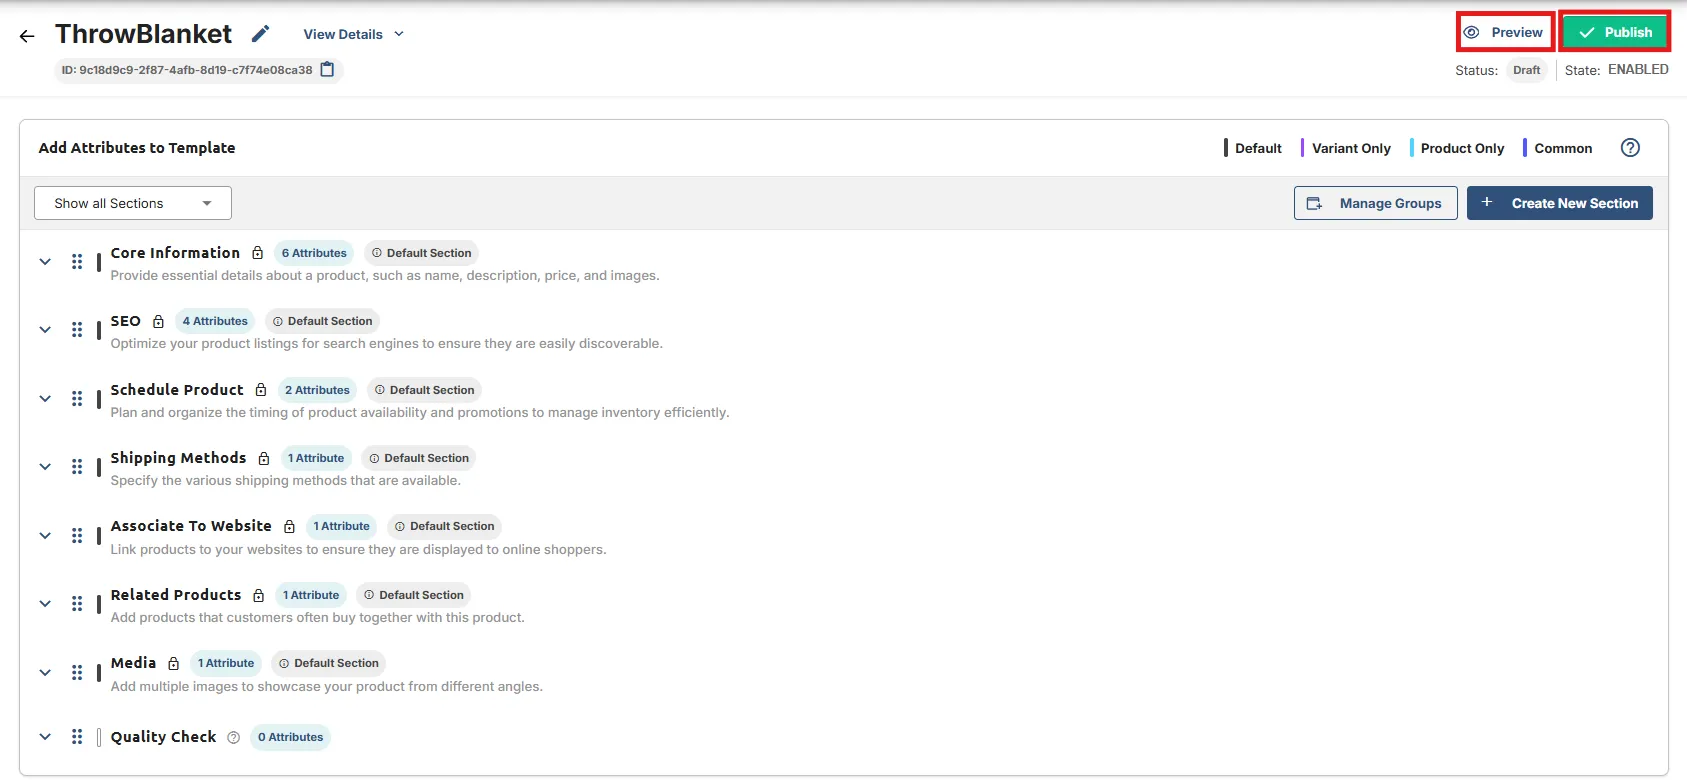
Once all Product Template details have been added, navigate to the top of the page where you will find two options:
- Preview Template: Click Preview Template to review the details of your product template before making it live. This allows you to ensure accuracy and completeness.
- Publish: Click Publish to officially publish your created product template on the NoChannel Commerce Portal. This action makes your template accessible and visible on the platform.
Note: When updating an existing Product Template, any changes will automatically generate a draft marked with the status "Edits in Published." This status means your edits are saved as a draft and won’t affect the live version until you choose to publish. You can safely save drafts, refine details, and publish when ready — without impacting the current published template.
Ensure that all details are accurate to your specific requirements before publishing the product template.
For detailed information on creating Products & Variants, go to the Variants Guide.